Changing The Coolant
Fragment manuala — str. 164–166
📋 Tekst do skopiowania / wyszukiwania
ENGINE
• Use only distilled water. However, if dis-
tilled water is not available, soft water may
be used. 4
4. Start the engine, warm it up for several min-
utes, and then turn it off.
5. Check:
• Coolant level
NOTE:
Before checking the coolant level, wait a few
minutes until it settles.
6. Install:
• Left side panel
Refer to “GENERAL CHASSIS” on page 4-1.
EAS21120 2
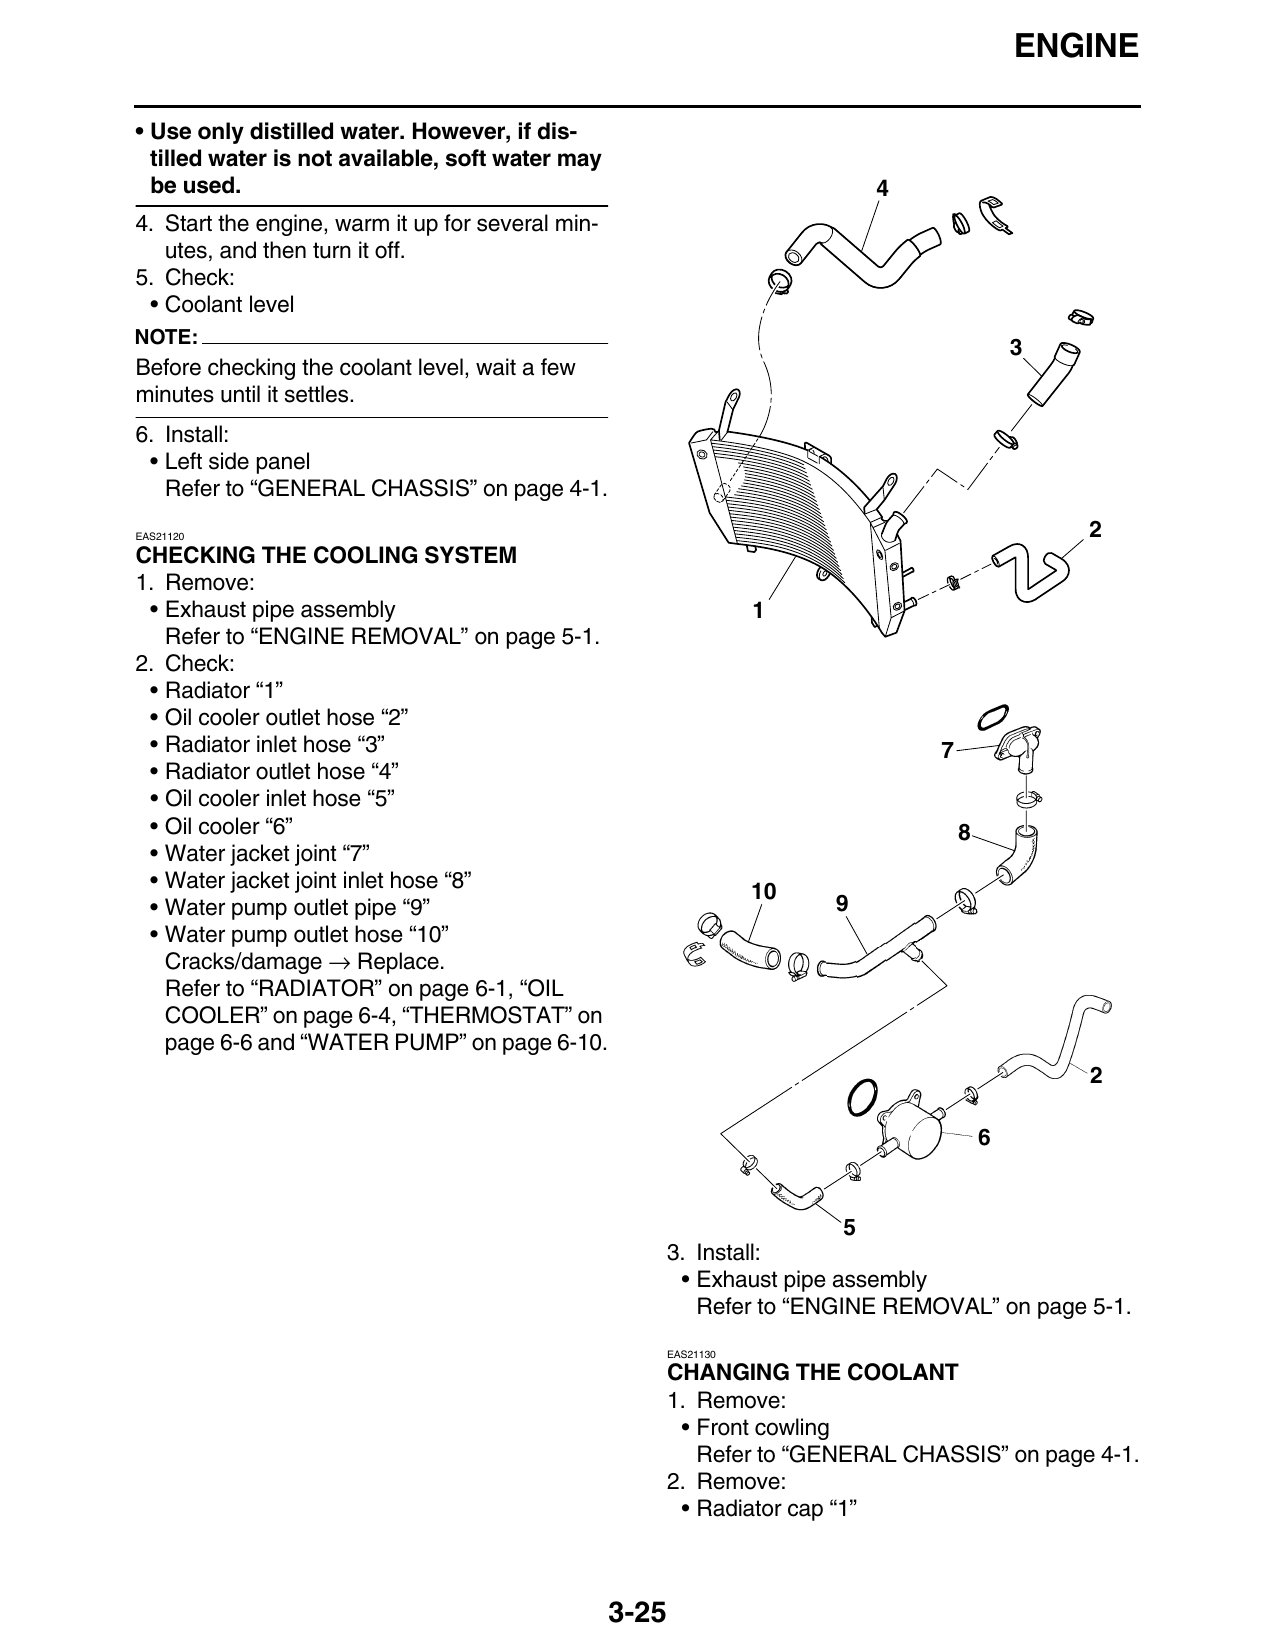
CHECKING THE COOLING SYSTEM
1. Remove:
• Exhaust pipe assembly 1
Refer to “ENGINE REMOVAL” on page 5-1.
2. Check:
• Radiator “1”
• Oil cooler outlet hose “2”
• Radiator inlet hose “3” 7
• Radiator outlet hose “4”
• Oil cooler inlet hose “5”
• Oil cooler “6” 8
• Water jacket joint “7”
• Water jacket joint inlet hose “8”
10 9
• Water pump outlet pipe “9”
• Water pump outlet hose “10”
Cracks/damage → Replace.
Refer to “RADIATOR” on page 6-1, “OIL
COOLER” on page 6-4, “THERMOSTAT” on
page 6-6 and “WATER PUMP” on page 6-10.
3. Install:
• Exhaust pipe assembly
Refer to “ENGINE REMOVAL” on page 5-1.
EAS21130
CHANGING THE COOLANT
1. Remove:
• Front cowling
Refer to “GENERAL CHASSIS” on page 4-1.
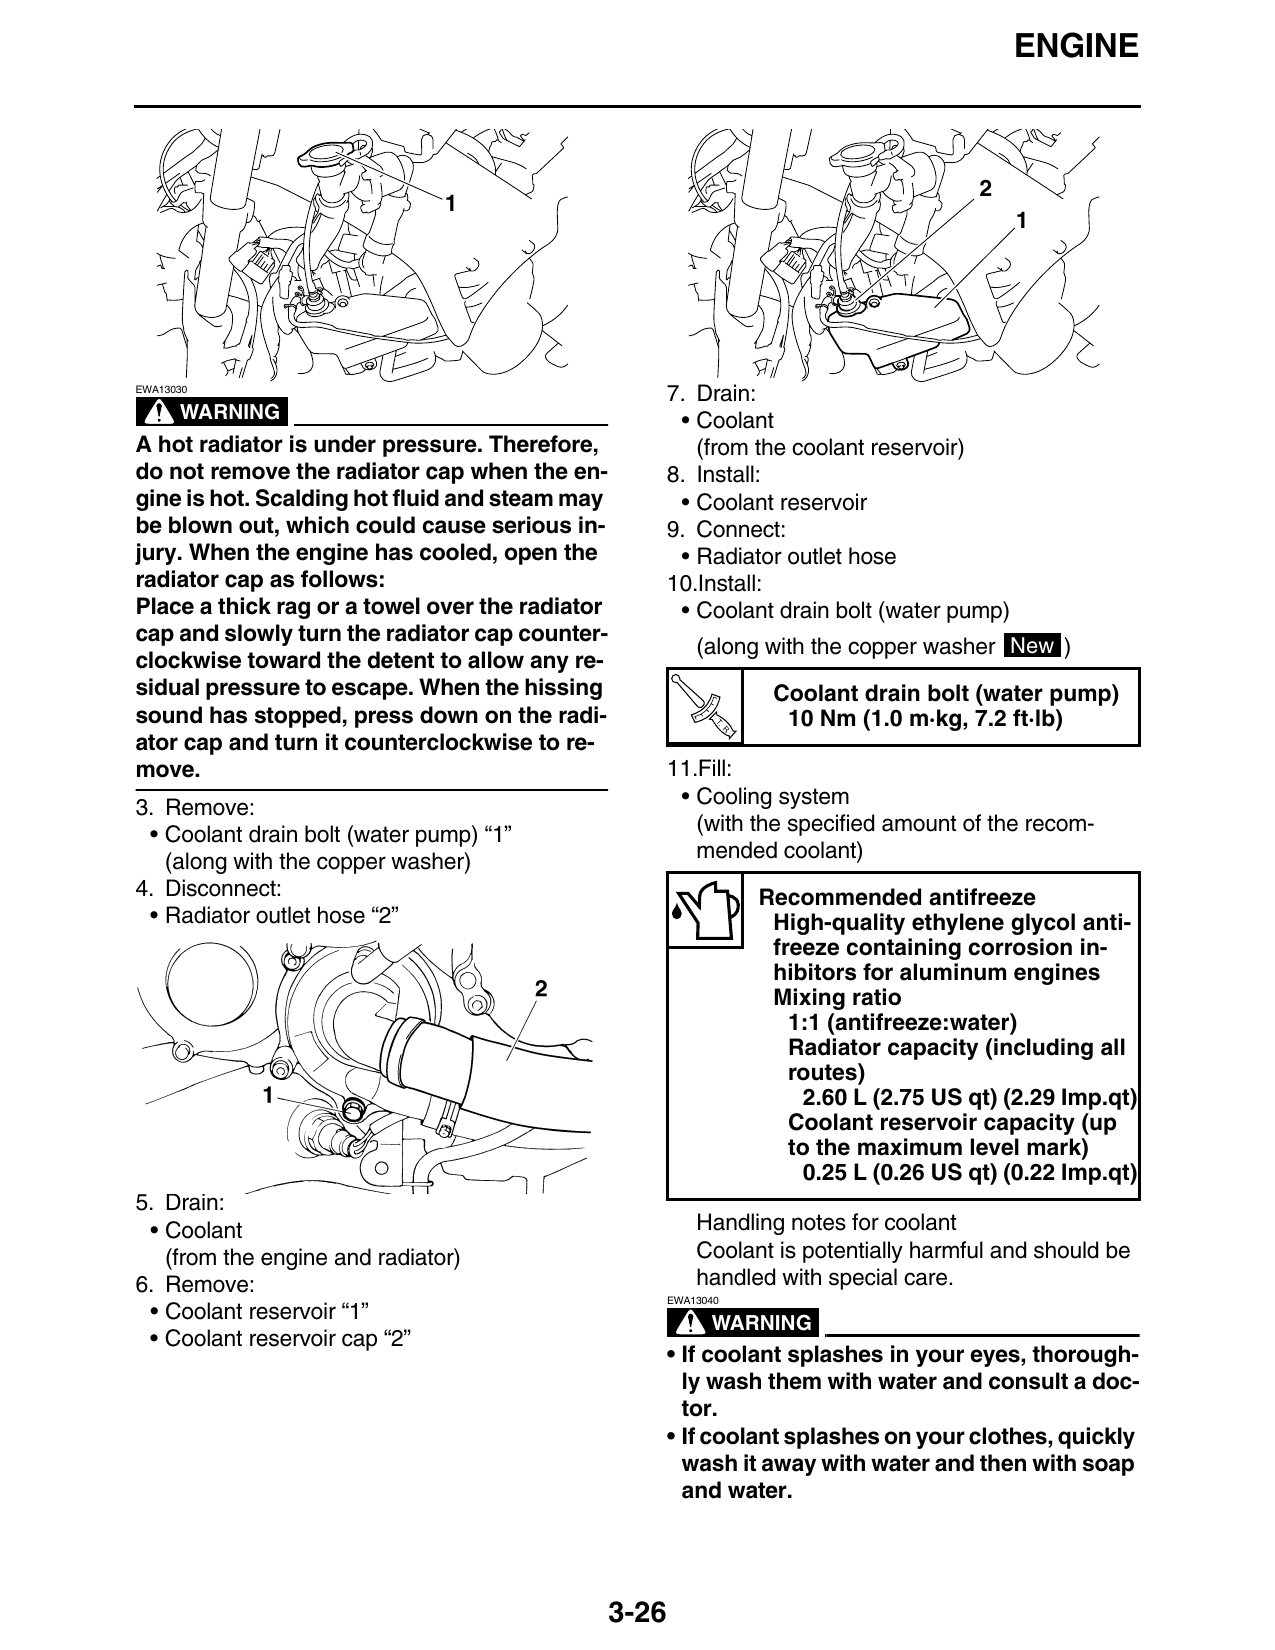
2. Remove:
• Radiator cap “1”
3-25
ENGINE
EWA13030
7. Drain:
WARNING • Coolant
A hot radiator is under pressure. Therefore, (from the coolant reservoir)
do not remove the radiator cap when the en- 8. Install:
gine is hot. Scalding hot fluid and steam may • Coolant reservoir
be blown out, which could cause serious in- 9. Connect:
jury. When the engine has cooled, open the • Radiator outlet hose
radiator cap as follows: 10.Install:
Place a thick rag or a towel over the radiator • Coolant drain bolt (water pump)
cap and slowly turn the radiator cap counter-
(along with the copper washer New )
clockwise toward the detent to allow any re-
sidual pressure to escape. When the hissing Coolant drain bolt (water pump)
sound has stopped, press down on the radi- T.
R.
10 Nm (1.0 m·kg, 7.2 ft·lb)
ator cap and turn it counterclockwise to re-
move. 11.Fill:
3. Remove: • Cooling system
• Coolant drain bolt (water pump) “1” (with the specified amount of the recom-
(along with the copper washer) mended coolant)
4. Disconnect: Recommended antifreeze
• Radiator outlet hose “2” High-quality ethylene glycol anti-
freeze containing corrosion in-
hibitors for aluminum engines
Mixing ratio
1:1 (antifreeze:water)
Radiator capacity (including all
routes)
2.60 L (2.75 US qt) (2.29 Imp.qt)
Coolant reservoir capacity (up
to the maximum level mark)
0.25 L (0.26 US qt) (0.22 Imp.qt)
5. Drain:
• Coolant Handling notes for coolant
(from the engine and radiator) Coolant is potentially harmful and should be
6. Remove: handled with special care.
EWA13040
• Coolant reservoir “1” WARNING
• Coolant reservoir cap “2”
• If coolant splashes in your eyes, thorough-
ly wash them with water and consult a doc-
tor.
• If coolant splashes on your clothes, quickly
wash it away with water and then with soap
and water.
3-26
ENGINE
• If coolant is swallowed, induce vomiting
and get immediate medical attention.
ECA13480
CAUTION:
• Adding water instead of coolant lowers the
antifreeze content of the coolant. If water is
used instead of coolant check, and if nec-
essary, correct the antifreeze concentra-
tion of the coolant.
• Use only distilled water. However, if dis-
tilled water is not available, soft water may
be used.
• If coolant comes into contact with painted
surfaces, immediately wash them with wa-
ter.
• Do not mix different types of antifreeze.
12.Install:
• Radiator cap
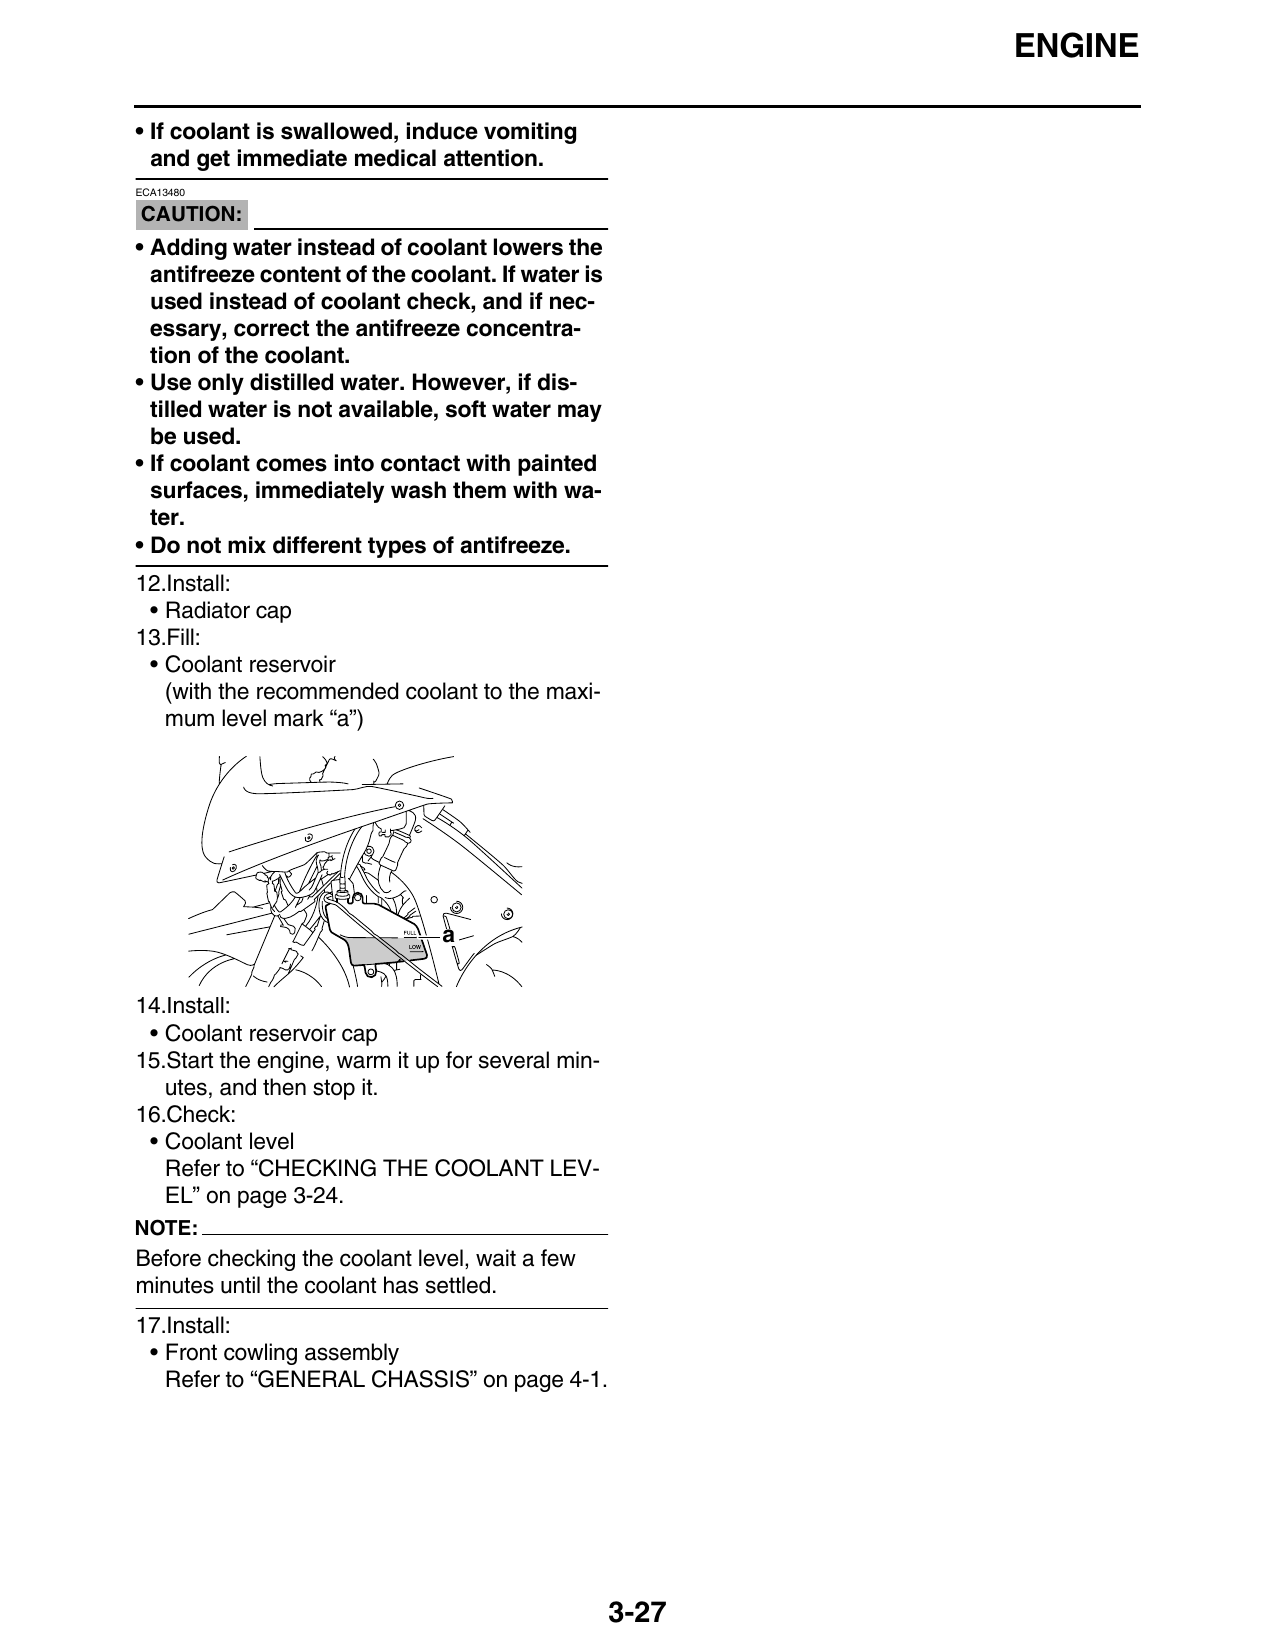
13.Fill:
• Coolant reservoir
(with the recommended coolant to the maxi-
mum level mark “a”)
a
14.Install:
• Coolant reservoir cap
15.Start the engine, warm it up for several min-
utes, and then stop it.
16.Check:
• Coolant level
Refer to “CHECKING THE COOLANT LEV-
EL” on page 3-24.
NOTE:
Before checking the coolant level, wait a few
minutes until the coolant has settled.
17.Install:
• Front cowling assembly
Refer to “GENERAL CHASSIS” on page 4-1.
3-27