Checking The Canister (For California Only)
Fragment manuala — str. 163
📋 Tekst do skopiowania / wyszukiwania
ENGINE
• Rider seat 4. Install:
Refer to “GENERAL CHASSIS” on page 4-1. • Side cowlings
Refer to “GENERAL CHASSIS” on page 4-1.
EAS21080
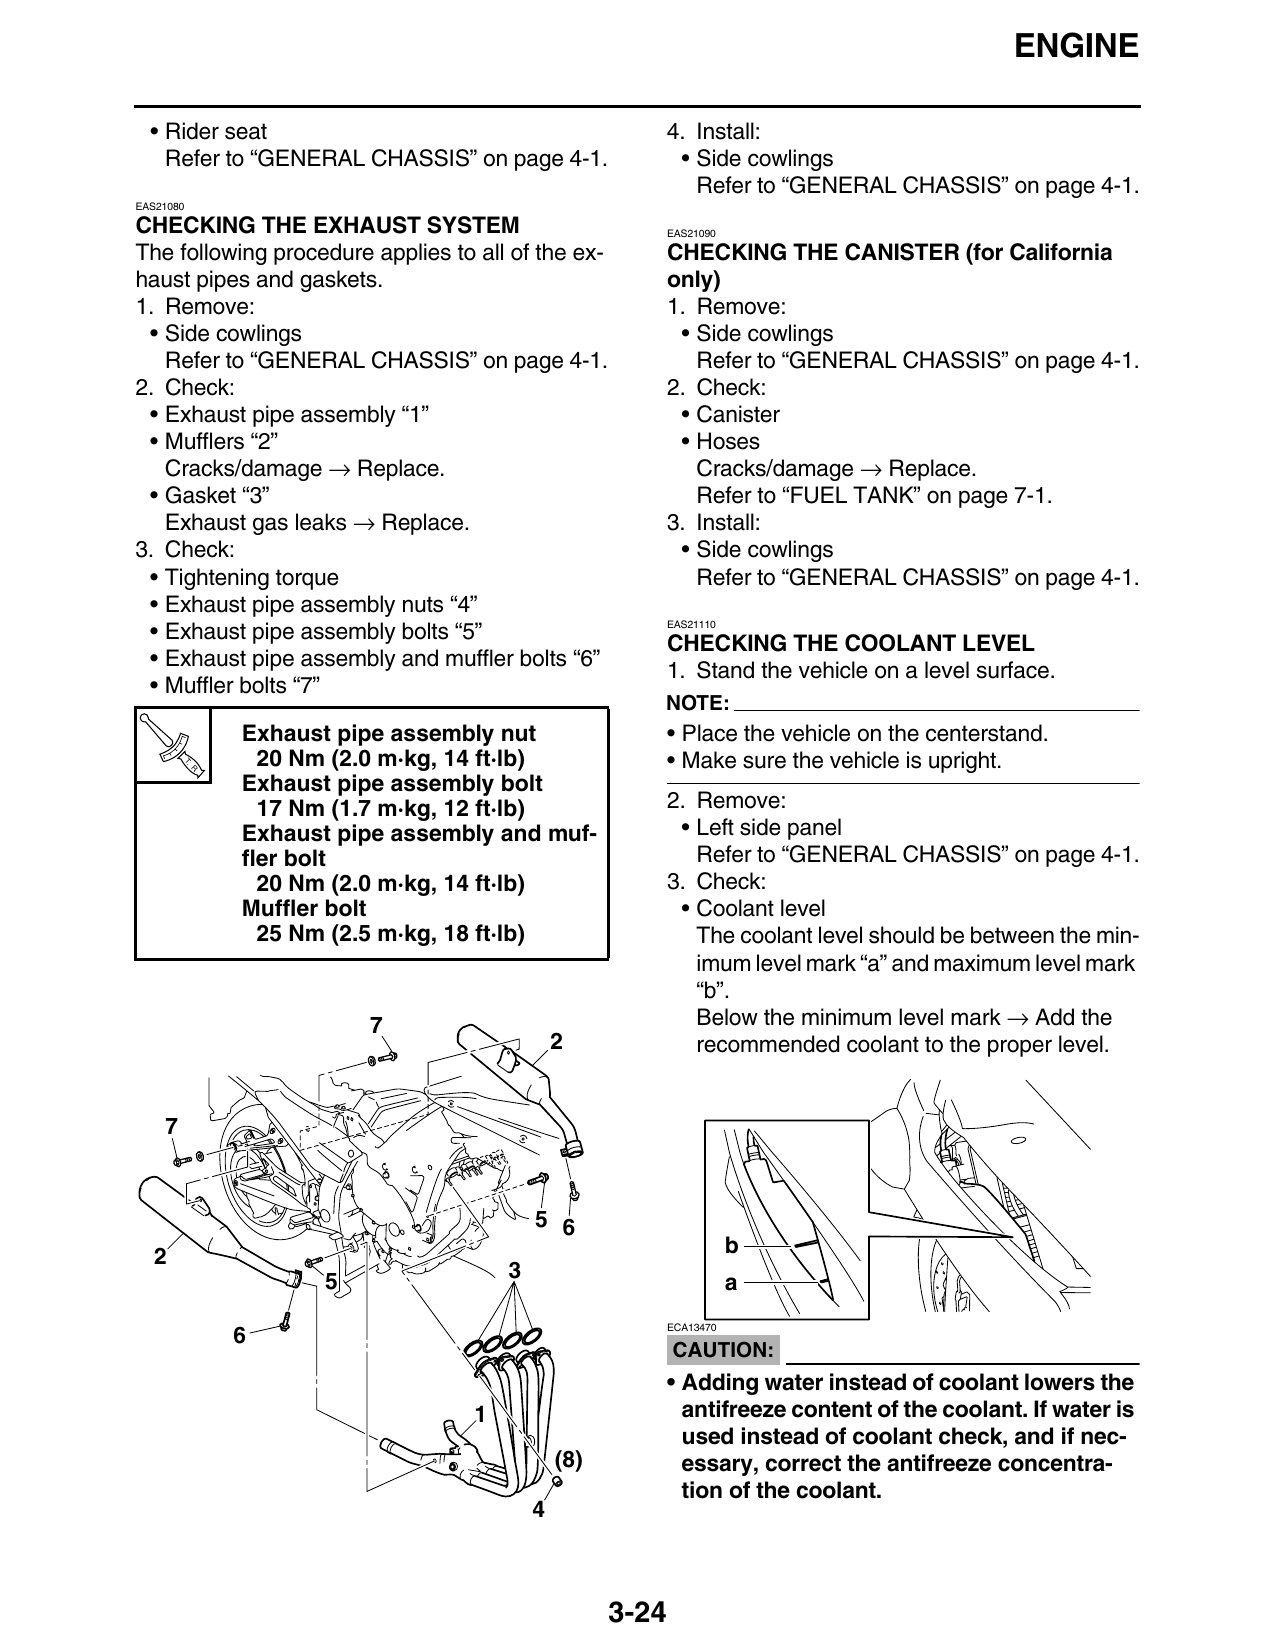
CHECKING THE EXHAUST SYSTEM EAS21090
The following procedure applies to all of the ex- CHECKING THE CANISTER (for California
haust pipes and gaskets. only)
1. Remove: 1. Remove:
• Side cowlings • Side cowlings
Refer to “GENERAL CHASSIS” on page 4-1. Refer to “GENERAL CHASSIS” on page 4-1.
2. Check: 2. Check:
• Exhaust pipe assembly “1” • Canister
• Mufflers “2” • Hoses
Cracks/damage → Replace. Cracks/damage → Replace.
• Gasket “3” Refer to “FUEL TANK” on page 7-1.
Exhaust gas leaks → Replace. 3. Install:
3. Check: • Side cowlings
• Tightening torque Refer to “GENERAL CHASSIS” on page 4-1.
• Exhaust pipe assembly nuts “4”
EAS21110
• Exhaust pipe assembly bolts “5”
CHECKING THE COOLANT LEVEL
• Exhaust pipe assembly and muffler bolts “6”
1. Stand the vehicle on a level surface.
• Muffler bolts “7”
NOTE:
Exhaust pipe assembly nut • Place the vehicle on the centerstand.
T.
R.
20 Nm (2.0 m·kg, 14 ft·lb) • Make sure the vehicle is upright.
Exhaust pipe assembly bolt
17 Nm (1.7 m·kg, 12 ft·lb) 2. Remove:
Exhaust pipe assembly and muf- • Left side panel
fler bolt Refer to “GENERAL CHASSIS” on page 4-1.
20 Nm (2.0 m·kg, 14 ft·lb) 3. Check:
Muffler bolt • Coolant level
25 Nm (2.5 m·kg, 18 ft·lb) The coolant level should be between the min-
imum level mark “a” and maximum level mark
“b”.
7 Below the minimum level mark → Add the
2 recommended coolant to the proper level.
5 6
2 b
5 3
a
ECA13470
CAUTION:
• Adding water instead of coolant lowers the
1 antifreeze content of the coolant. If water is
used instead of coolant check, and if nec-
(8) essary, correct the antifreeze concentra-
tion of the coolant.
3-24