Checking The Front Fork
Fragment manuala — str. 174
📋 Tekst do skopiowania / wyszukiwania
CHASSIS
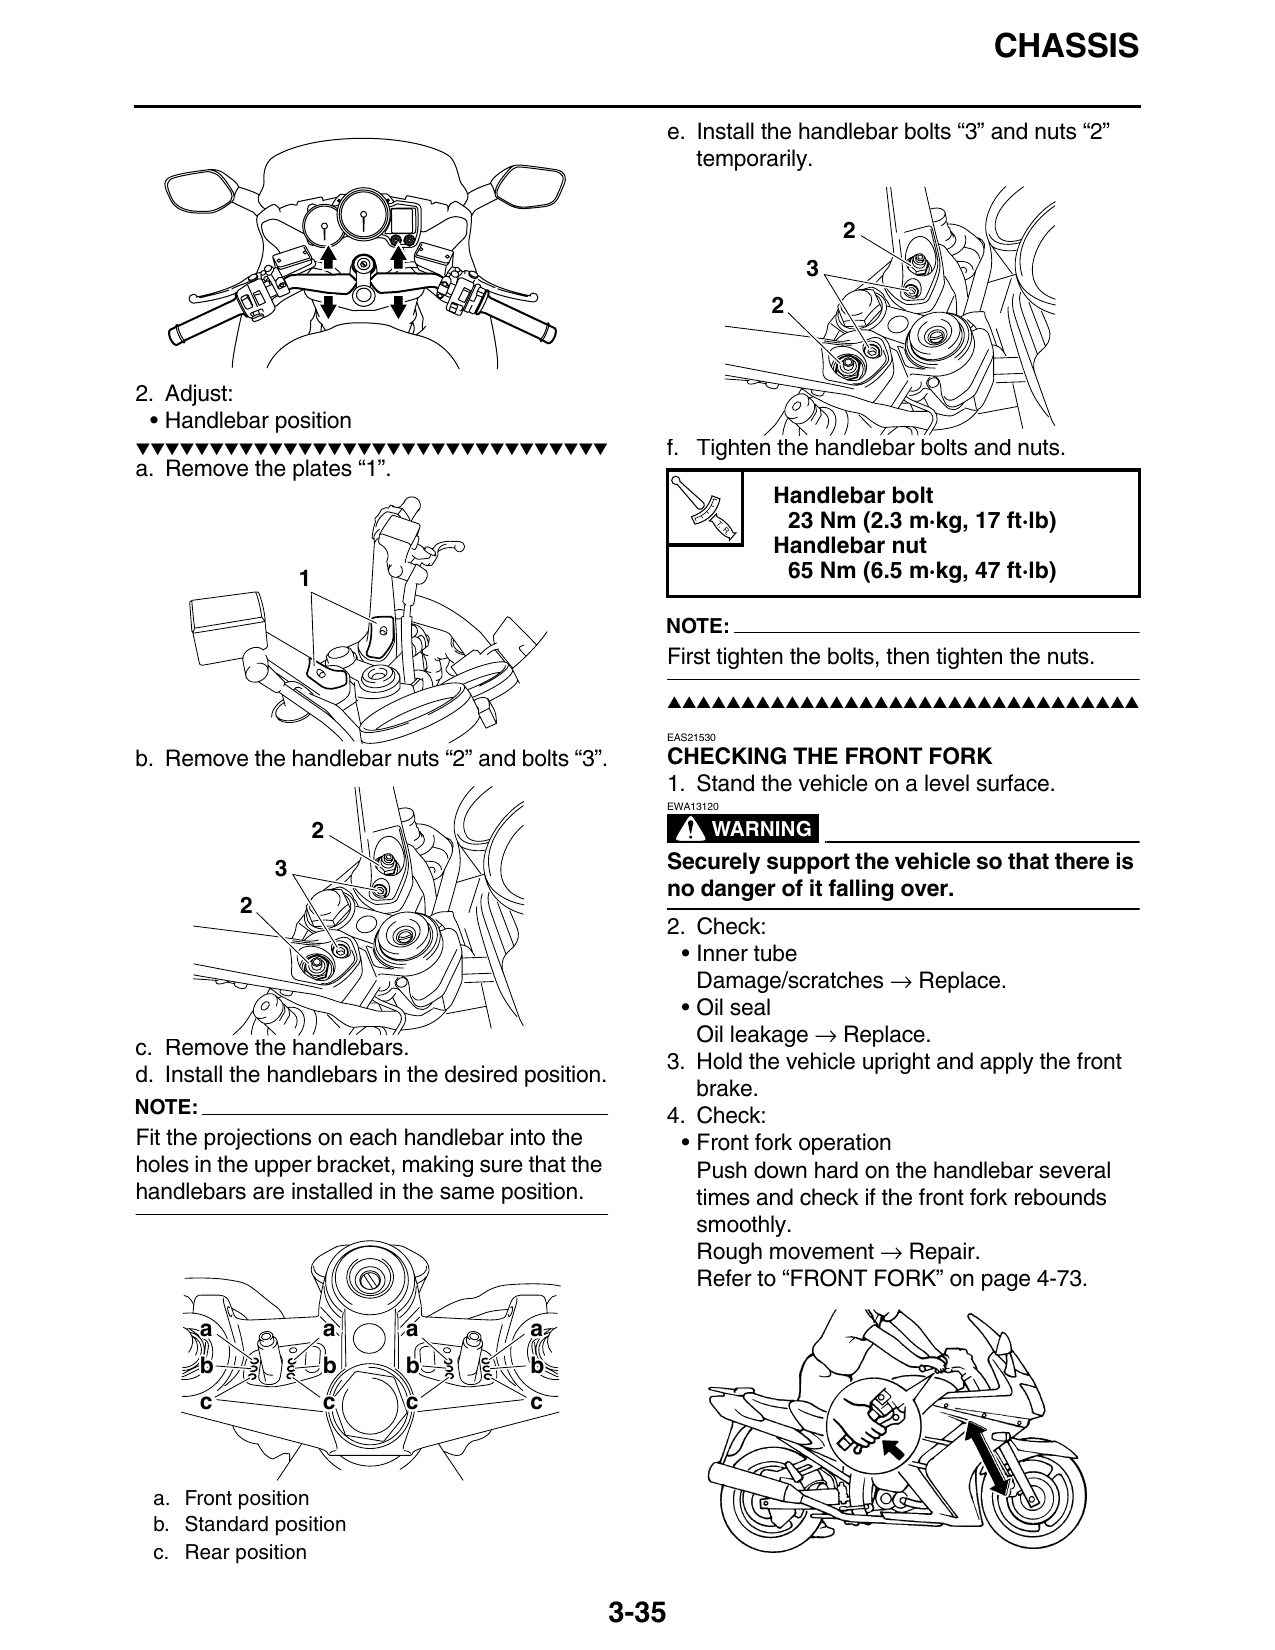
e. Install the handlebar bolts “3” and nuts “2”
temporarily.
2. Adjust:
• Handlebar position
▼▼▼▼▼▼▼▼▼▼▼▼▼▼▼▼▼▼▼▼▼▼▼▼▼▼▼▼▼▼▼▼ f. Tighten the handlebar bolts and nuts.
a. Remove the plates “1”.
Handlebar bolt
T.
R.
23 Nm (2.3 m·kg, 17 ft·lb)
Handlebar nut
1 65 Nm (6.5 m·kg, 47 ft·lb)
NOTE:
First tighten the bolts, then tighten the nuts.
▲▲▲▲▲▲▲▲▲▲▲▲▲▲▲▲▲▲▲▲▲▲▲▲▲▲▲▲▲▲▲▲
EAS21530
b. Remove the handlebar nuts “2” and bolts “3”. CHECKING THE FRONT FORK
1. Stand the vehicle on a level surface.
EWA13120
2 WARNING
3 Securely support the vehicle so that there is
no danger of it falling over.
2. Check:
• Inner tube
Damage/scratches → Replace.
• Oil seal
Oil leakage → Replace.
c. Remove the handlebars.
3. Hold the vehicle upright and apply the front
d. Install the handlebars in the desired position.
brake.
NOTE: 4. Check:
Fit the projections on each handlebar into the • Front fork operation
holes in the upper bracket, making sure that the Push down hard on the handlebar several
handlebars are installed in the same position. times and check if the front fork rebounds
smoothly.
Rough movement → Repair.
Refer to “FRONT FORK” on page 4-73.
a a a a
b b b b
c c c c
a. Front position
b. Standard position
c. Rear position
3-35