Checking The Connecting Arm And Relay Arm
Fragment manuala — str. 277
📋 Tekst do skopiowania / wyszukiwania
REAR SHOCK ABSORBER ASSEMBLY
• Rear shock absorber
Gas leaks/oil leaks → Replace the rear shock
absorber assembly.
• Spring
Damage/wear → Replace the rear shock ab-
sorber assembly.
• Bushing
Damage/wear → Replace the rear shock ab-
sorber assembly.
• Spacer
Damage/scratches → Replace.
• Bolts
Bends/damage/wear → Replace.
EAS23260
CHECKING THE CONNECTING ARM AND
RELAY ARM
1. Check:
• Connecting arms
• Relay arm
Damage/wear → Replace.
2. Check: 3. Install:
• Bearings • Relay arm
• Oil seals NOTE:
Damage/pitting → Replace. Make sure that the embossed mark “5JW” on
3. Check: the relay arm faces to the left.
• Spacers
Damage/scratches → Replace.
EAS23270
INSTALLING THE RELAY ARM
1. Lubricate: 5JW
• Spacer
• Bearings
Recommended lubricant
Lithium-soap-based grease
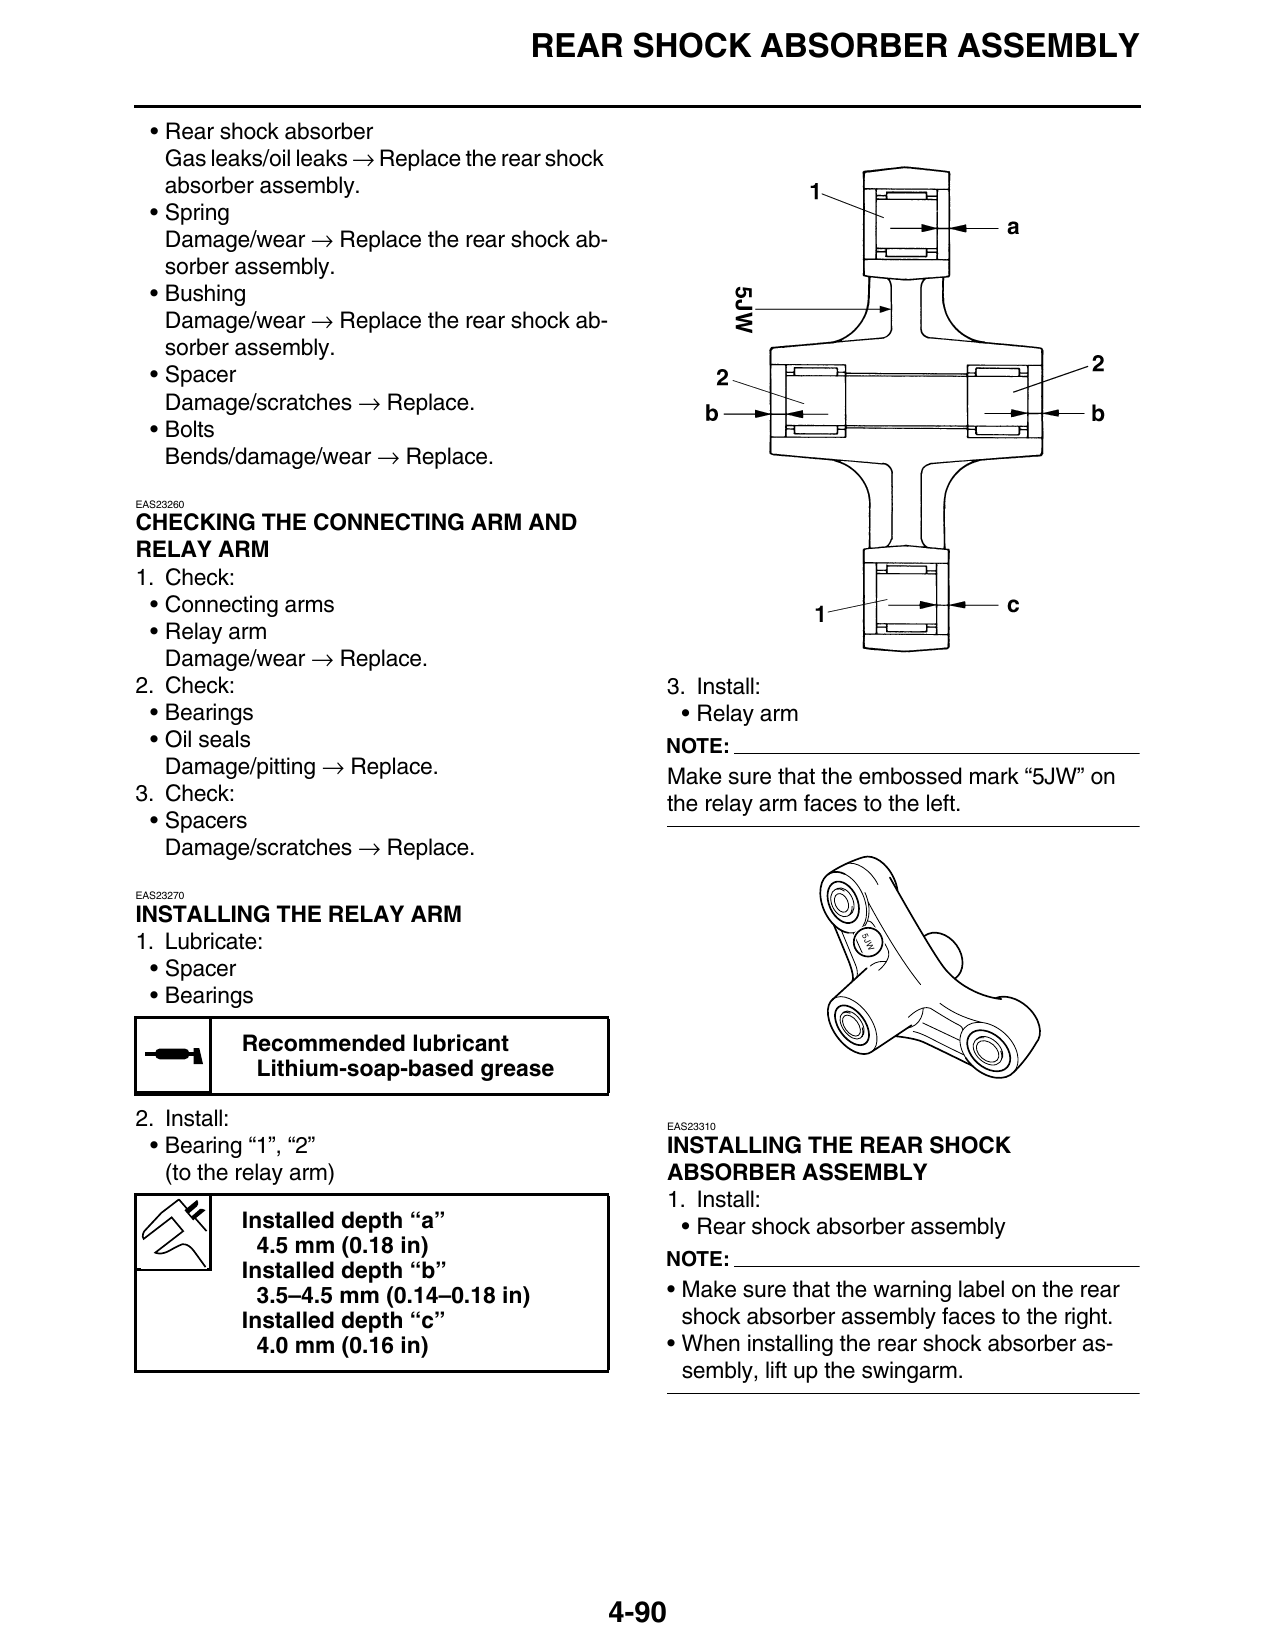
2. Install: EAS23310
• Bearing “1”, “2” INSTALLING THE REAR SHOCK
(to the relay arm) ABSORBER ASSEMBLY
1. Install:
Installed depth “a” • Rear shock absorber assembly
4.5 mm (0.18 in)
NOTE:
Installed depth “b”
3.5–4.5 mm (0.14–0.18 in) • Make sure that the warning label on the rear
Installed depth “c” shock absorber assembly faces to the right.
4.0 mm (0.16 in) • When installing the rear shock absorber as-
sembly, lift up the swingarm.
4-90