Checking The Primary Driven Gear
Fragment manuala — str. 359
📋 Tekst do skopiowania / wyszukiwania
CLUTCH
EAS25250
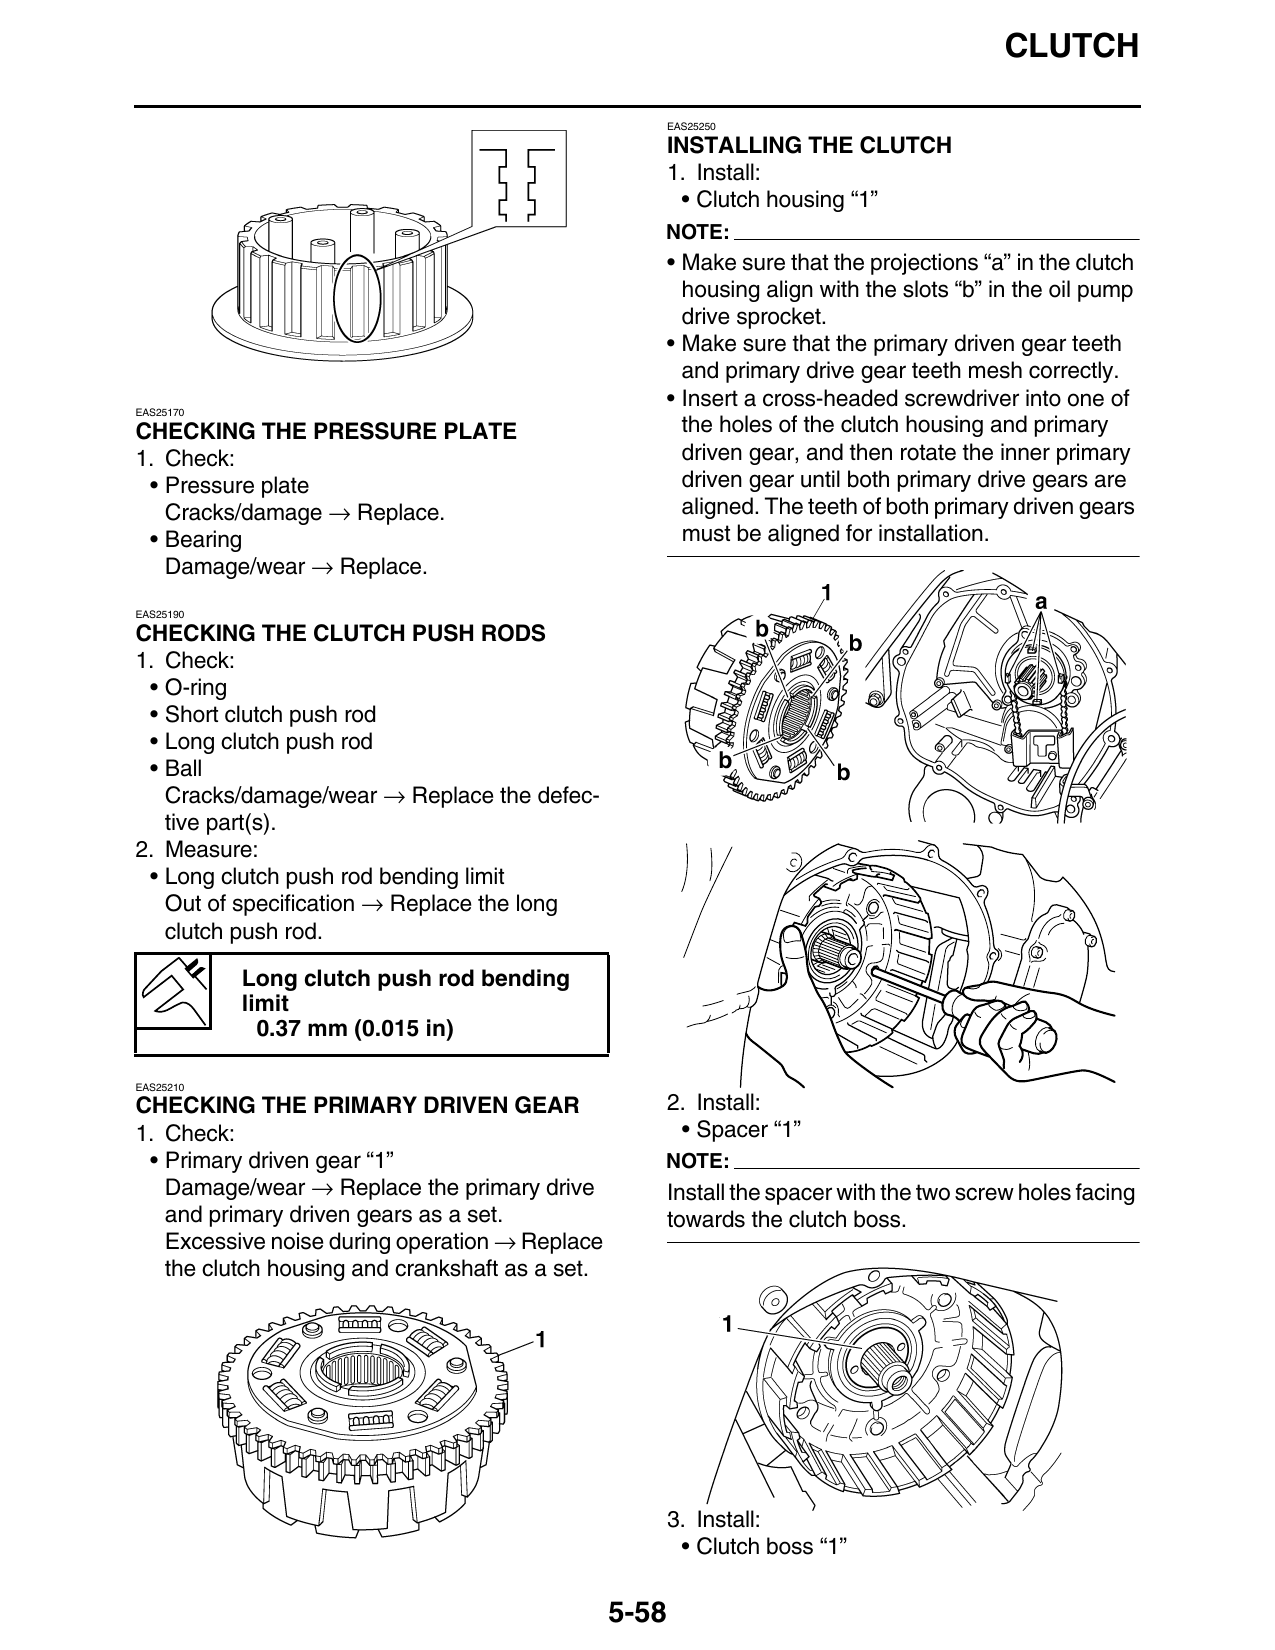
INSTALLING THE CLUTCH
1. Install:
• Clutch housing “1”
NOTE:
• Make sure that the projections “a” in the clutch
housing align with the slots “b” in the oil pump
drive sprocket.
• Make sure that the primary driven gear teeth
and primary drive gear teeth mesh correctly.
EAS25170
• Insert a cross-headed screwdriver into one of
CHECKING THE PRESSURE PLATE the holes of the clutch housing and primary
1. Check: driven gear, and then rotate the inner primary
• Pressure plate driven gear until both primary drive gears are
Cracks/damage → Replace. aligned. The teeth of both primary driven gears
• Bearing must be aligned for installation.
Damage/wear → Replace.
EAS25190
CHECKING THE CLUTCH PUSH RODS
1. Check:
• O-ring
• Short clutch push rod
• Long clutch push rod
• Ball
Cracks/damage/wear → Replace the defec-
tive part(s).
2. Measure:
• Long clutch push rod bending limit
Out of specification → Replace the long
clutch push rod.
Long clutch push rod bending
limit
0.37 mm (0.015 in)
EAS25210
CHECKING THE PRIMARY DRIVEN GEAR 2. Install:
1. Check: • Spacer “1”
• Primary driven gear “1” NOTE:
Damage/wear → Replace the primary drive Install the spacer with the two screw holes facing
and primary driven gears as a set. towards the clutch boss.
Excessive noise during operation → Replace
the clutch housing and crankshaft as a set.
3. Install:
• Clutch boss “1”
5-58