Installing The Clutch Master Cylinder (FJR13A)
Fragment manuala — str. 362
📋 Tekst do skopiowania / wyszukiwania
CLUTCH
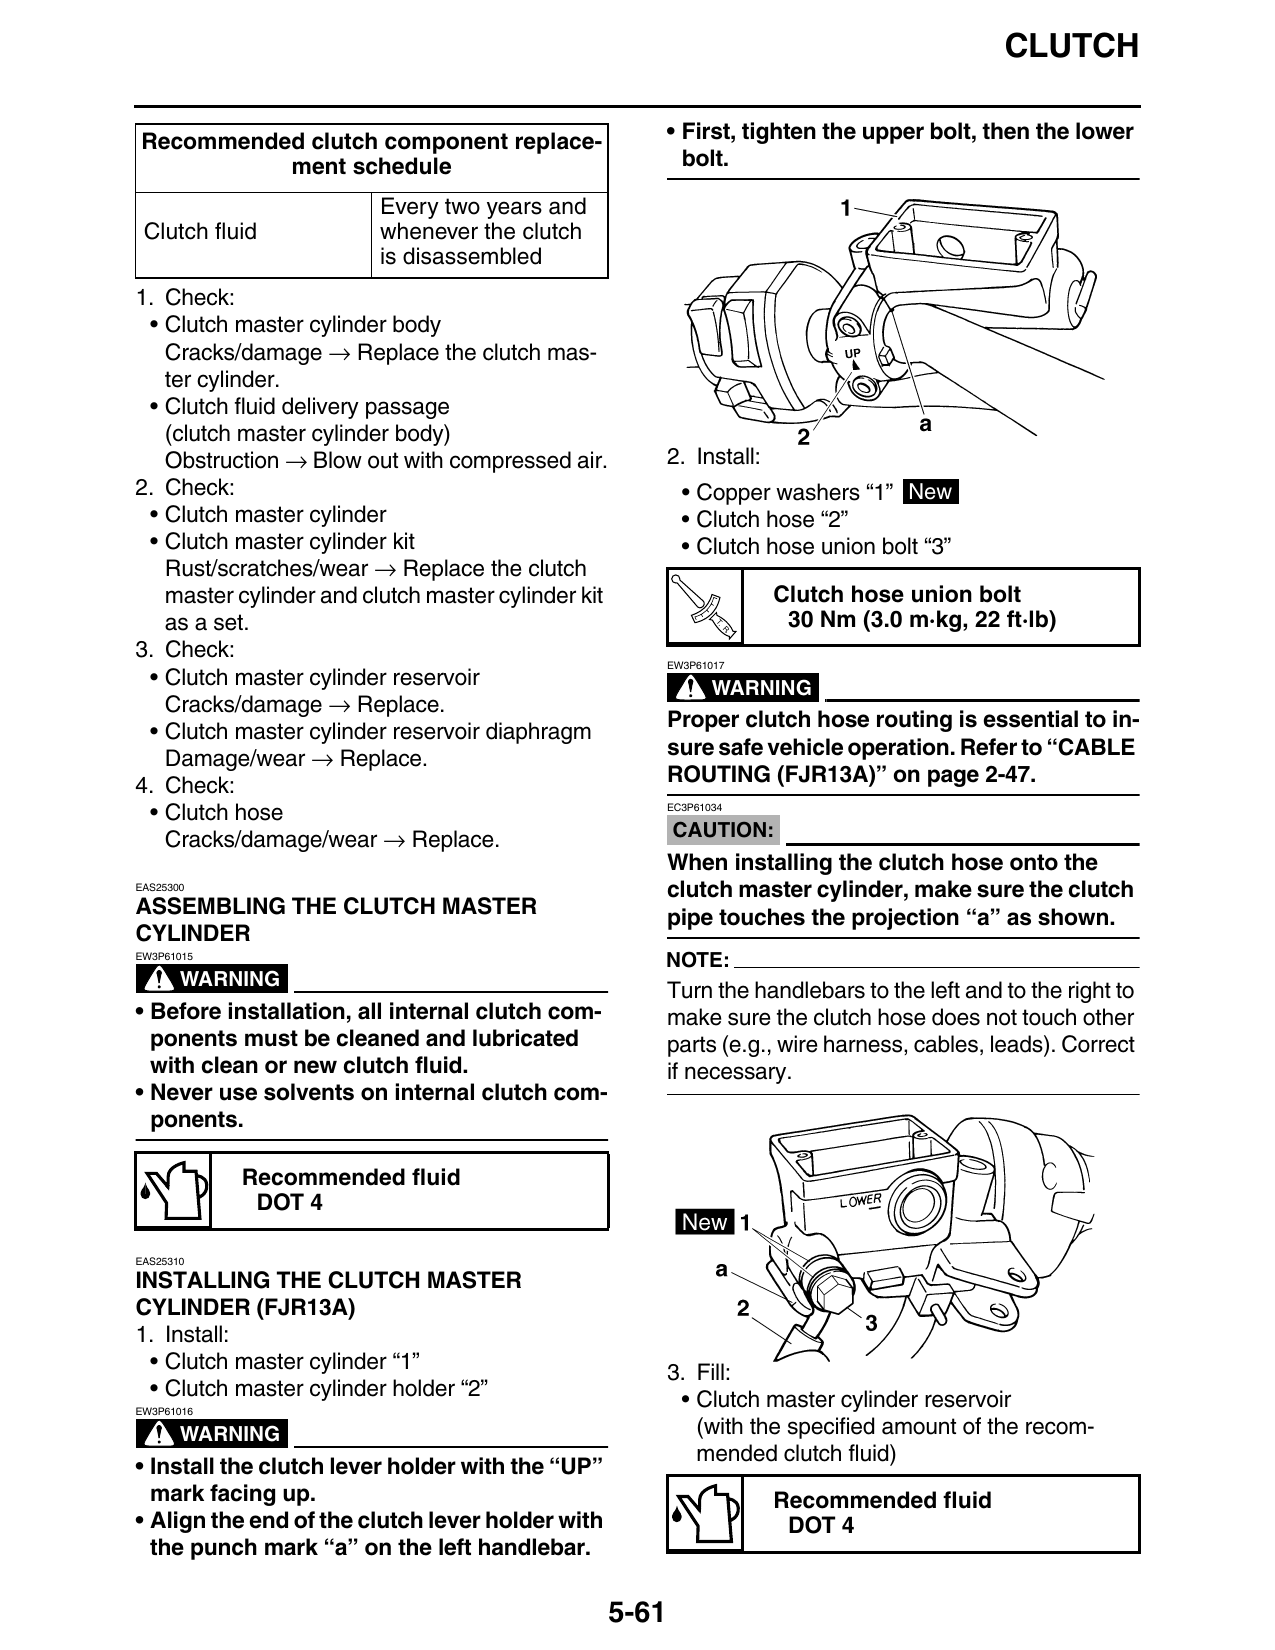
Recommended clutch component replace- • First, tighten the upper bolt, then the lower
ment schedule bolt.
Every two years and
Clutch fluid whenever the clutch
is disassembled
1. Check:
• Clutch master cylinder body
Cracks/damage → Replace the clutch mas-
ter cylinder.
• Clutch fluid delivery passage
(clutch master cylinder body)
Obstruction → Blow out with compressed air. 2. Install:
2. Check: • Copper washers “1” New
• Clutch master cylinder • Clutch hose “2”
• Clutch master cylinder kit • Clutch hose union bolt “3”
Rust/scratches/wear → Replace the clutch
master cylinder and clutch master cylinder kit Clutch hose union bolt
as a set. T.
R.
30 Nm (3.0 m·kg, 22 ft·lb)
3. Check: EW3P61017
• Clutch master cylinder reservoir WARNING
Cracks/damage → Replace.
• Clutch master cylinder reservoir diaphragm Proper clutch hose routing is essential to in-
Damage/wear → Replace. sure safe vehicle operation. Refer to “CABLE
ROUTING (FJR13A)” on page 2-47.
4. Check:
• Clutch hose EC3P61034
Cracks/damage/wear → Replace. CAUTION:
When installing the clutch hose onto the
EAS25300
clutch master cylinder, make sure the clutch
ASSEMBLING THE CLUTCH MASTER pipe touches the projection “a” as shown.
CYLINDER
EW3P61015
NOTE:
WARNING
Turn the handlebars to the left and to the right to
• Before installation, all internal clutch com- make sure the clutch hose does not touch other
ponents must be cleaned and lubricated parts (e.g., wire harness, cables, leads). Correct
with clean or new clutch fluid. if necessary.
• Never use solvents on internal clutch com-
ponents.
Recommended fluid
DOT 4
EAS25310
INSTALLING THE CLUTCH MASTER
CYLINDER (FJR13A)
1. Install:
• Clutch master cylinder “1” 3. Fill:
• Clutch master cylinder holder “2” • Clutch master cylinder reservoir
EW3P61016
WARNING (with the specified amount of the recom-
mended clutch fluid)
• Install the clutch lever holder with the “UP”
mark facing up. Recommended fluid
• Align the end of the clutch lever holder with DOT 4
the punch mark “a” on the left handlebar.
5-61