Installing The Front Brake Master Cylinder
Fragment manuala — str. 226–227
📋 Tekst do skopiowania / wyszukiwania
FRONT BRAKE
EAS22490 EAS22520
REMOVING THE FRONT BRAKE MASTER ASSEMBLING THE FRONT BRAKE MASTER
CYLINDER CYLINDER
EWA13520
NOTE:
WARNING
Before removing the front brake master cylinder,
• Before installation, all internal brake com-
drain the brake fluid from the entire brake sys-
ponents should be cleaned and lubricated
tem.
with clean or new brake fluid.
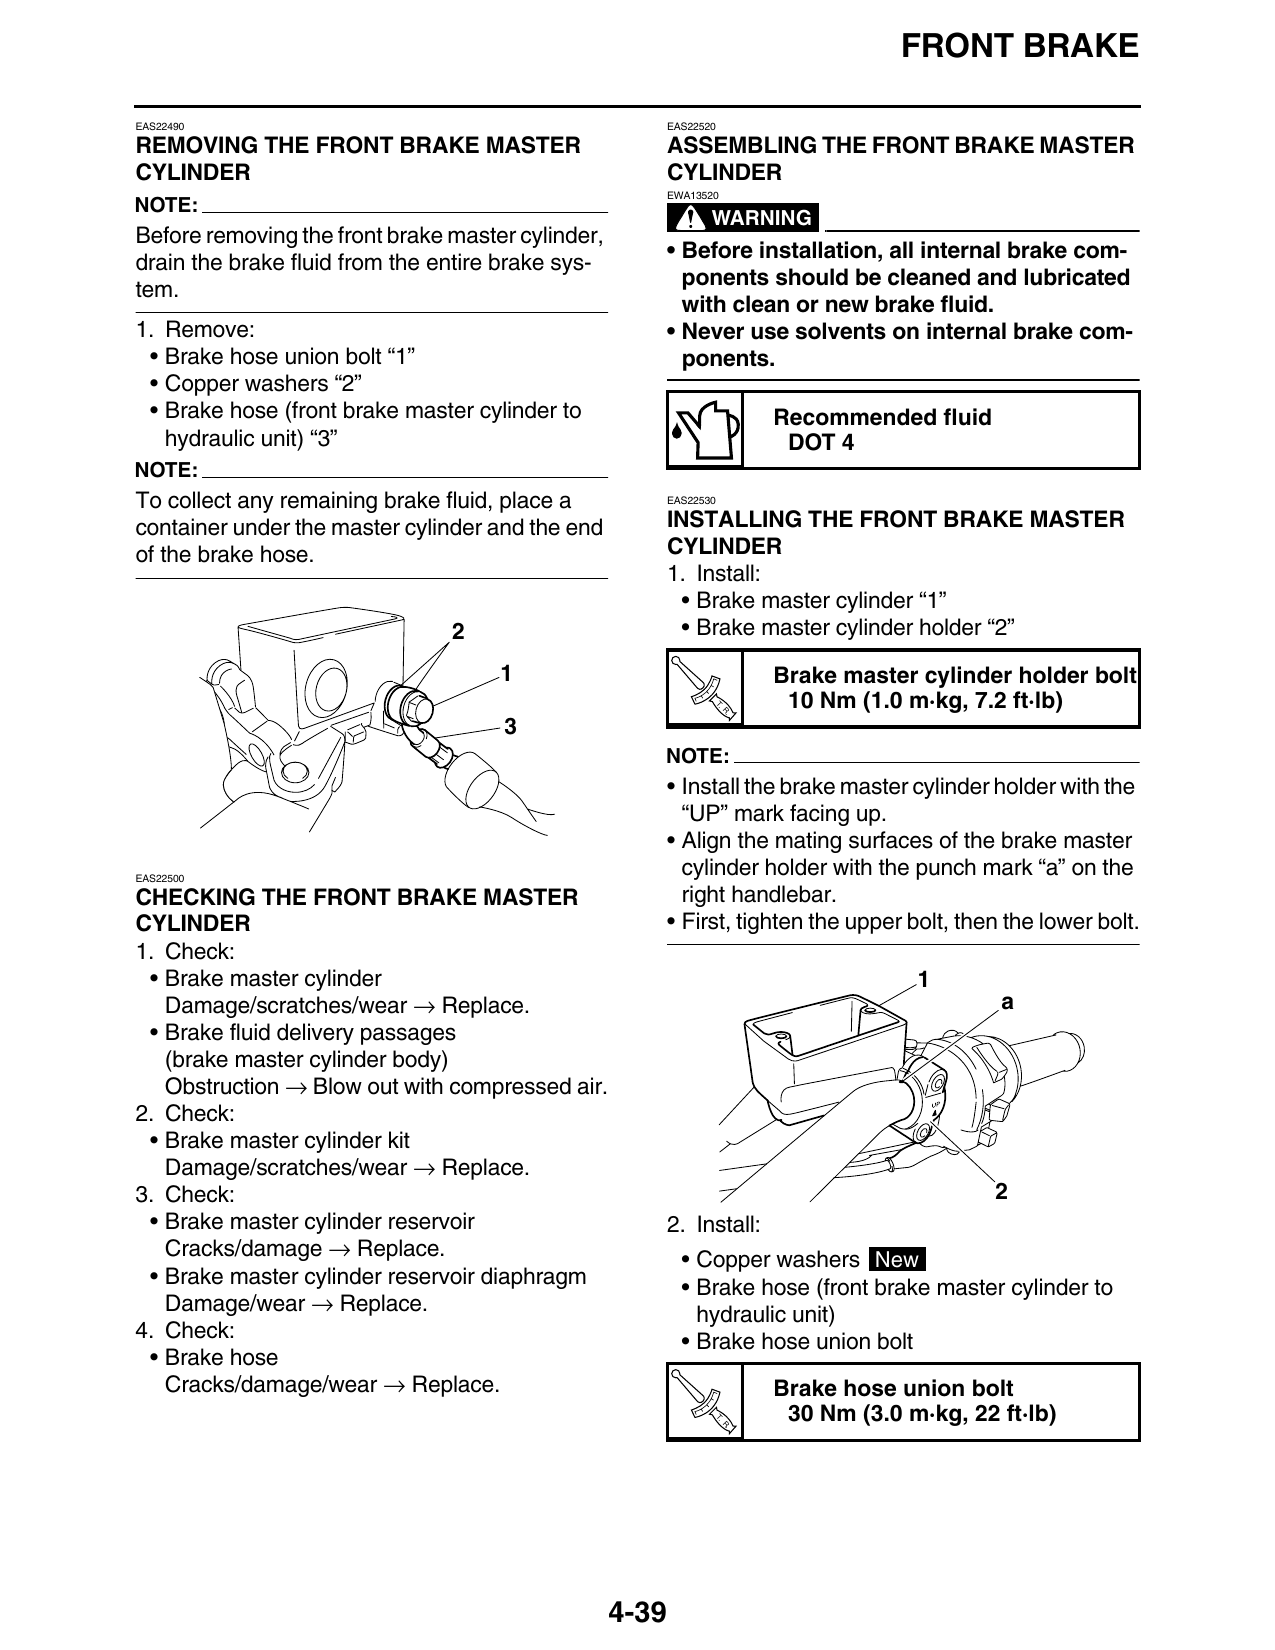
1. Remove: • Never use solvents on internal brake com-
• Brake hose union bolt “1” ponents.
• Copper washers “2”
• Brake hose (front brake master cylinder to Recommended fluid
hydraulic unit) “3” DOT 4
NOTE:
To collect any remaining brake fluid, place a EAS22530
container under the master cylinder and the end INSTALLING THE FRONT BRAKE MASTER
of the brake hose. CYLINDER
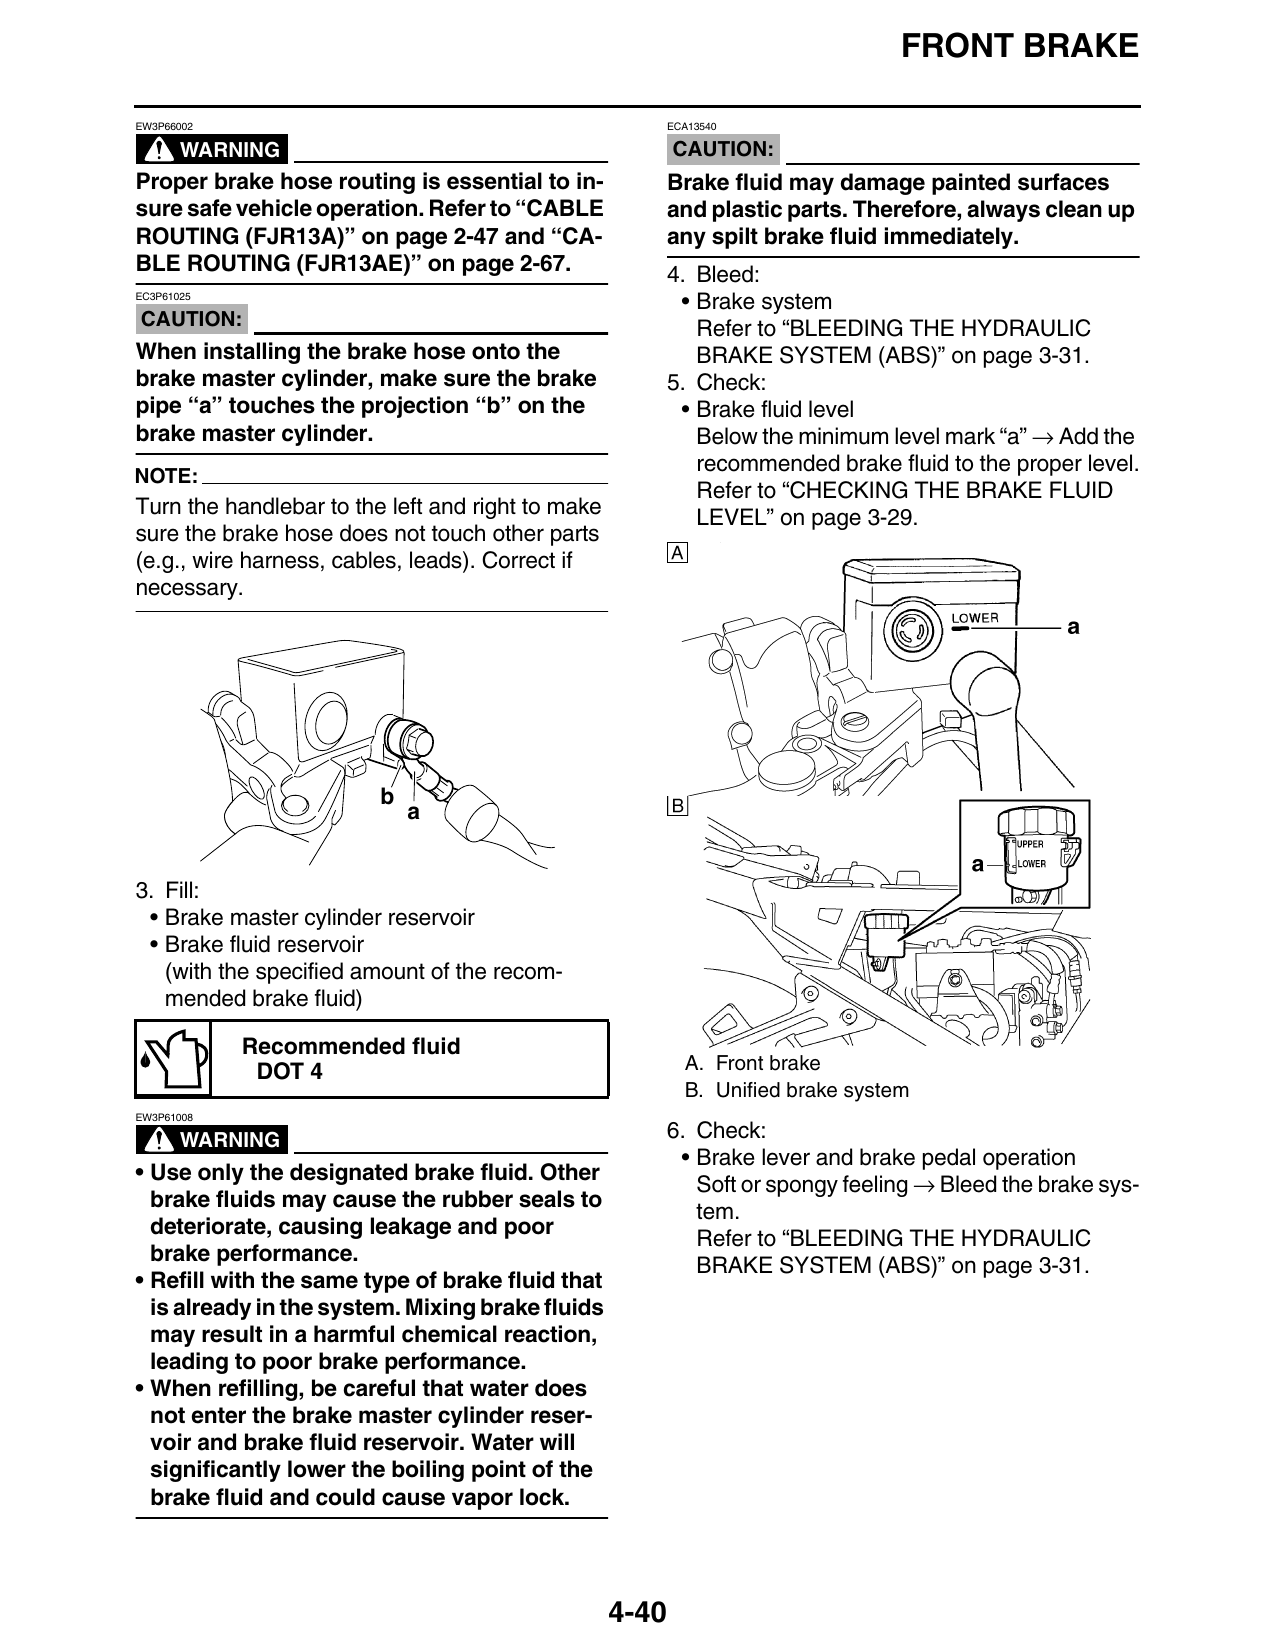
1. Install:
• Brake master cylinder “1”
2 • Brake master cylinder holder “2”
1 Brake master cylinder holder bolt
T.
R.
10 Nm (1.0 m·kg, 7.2 ft·lb)
NOTE:
• Install the brake master cylinder holder with the
“UP” mark facing up.
• Align the mating surfaces of the brake master
EAS22500
cylinder holder with the punch mark “a” on the
CHECKING THE FRONT BRAKE MASTER right handlebar.
CYLINDER • First, tighten the upper bolt, then the lower bolt.
1. Check:
• Brake master cylinder 1
Damage/scratches/wear → Replace. a
• Brake fluid delivery passages
(brake master cylinder body)
Obstruction → Blow out with compressed air.
2. Check:
• Brake master cylinder kit
Damage/scratches/wear → Replace.
3. Check: 2
• Brake master cylinder reservoir 2. Install:
Cracks/damage → Replace. • Copper washers New
• Brake master cylinder reservoir diaphragm • Brake hose (front brake master cylinder to
Damage/wear → Replace. hydraulic unit)
4. Check: • Brake hose union bolt
• Brake hose
Cracks/damage/wear → Replace. Brake hose union bolt
T.
R.
30 Nm (3.0 m·kg, 22 ft·lb)
4-39
FRONT BRAKE
EW3P66002 ECA13540
WARNING CAUTION:
Proper brake hose routing is essential to in- Brake fluid may damage painted surfaces
sure safe vehicle operation. Refer to “CABLE and plastic parts. Therefore, always clean up
ROUTING (FJR13A)” on page 2-47 and “CA- any spilt brake fluid immediately.
BLE ROUTING (FJR13AE)” on page 2-67. 4. Bleed:
EC3P61025
• Brake system
CAUTION: Refer to “BLEEDING THE HYDRAULIC
When installing the brake hose onto the BRAKE SYSTEM (ABS)” on page 3-31.
brake master cylinder, make sure the brake 5. Check:
pipe “a” touches the projection “b” on the • Brake fluid level
brake master cylinder. Below the minimum level mark “a” → Add the
recommended brake fluid to the proper level.
NOTE:
Refer to “CHECKING THE BRAKE FLUID
Turn the handlebar to the left and right to make
LEVEL” on page 3-29.
sure the brake hose does not touch other parts
(e.g., wire harness, cables, leads). Correct if
necessary.
b
a
3. Fill:
• Brake master cylinder reservoir
• Brake fluid reservoir
(with the specified amount of the recom-
mended brake fluid)
Recommended fluid
DOT 4 A. Front brake
B. Unified brake system
EW3P61008
WARNING 6. Check:
• Brake lever and brake pedal operation
• Use only the designated brake fluid. Other
Soft or spongy feeling → Bleed the brake sys-
brake fluids may cause the rubber seals to
tem.
deteriorate, causing leakage and poor
Refer to “BLEEDING THE HYDRAULIC
brake performance.
BRAKE SYSTEM (ABS)” on page 3-31.
• Refill with the same type of brake fluid that
is already in the system. Mixing brake fluids
may result in a harmful chemical reaction,
leading to poor brake performance.
• When refilling, be careful that water does
not enter the brake master cylinder reser-
voir and brake fluid reservoir. Water will
significantly lower the boiling point of the
brake fluid and could cause vapor lock.
4-40