Breaking In The Friction Plates After Replacement (FJR13AE Only)
Fragment manuala — str. 360
📋 Tekst do skopiowania / wyszukiwania
CLUTCH
• Lock washer “2” New
Recommended lubricant
• Clutch boss nut “3” Engine oil
Clutch boss nut
7. Install:
T. 90 Nm (9.0 m·kg, 65 ft·lb)
R.
• Friction plates
• Clutch plates
NOTE:
NOTE:
• Install the clutch boss nut with its large inner di-
ameter side facing inward as shown in the illus- First, install a friction plate and then alternate be-
tration. tween a clutch plate and a friction plate.
• While holding the clutch boss with the univer- 8. Install:
sal clutch holder “4”, tighten the clutch boss • Clutch spring bolts
nut.
Clutch spring bolt
Universal clutch holder T.
R.
8 Nm (0.8 m·kg, 5.8 ft·lb)
90890-04086
YM-91042 NOTE:
Tighten the clutch spring bolts in stages and in a
crisscross pattern.
9. Install:
• Rear balancer weight
Refer to “BALANCERS” on page 5-127.
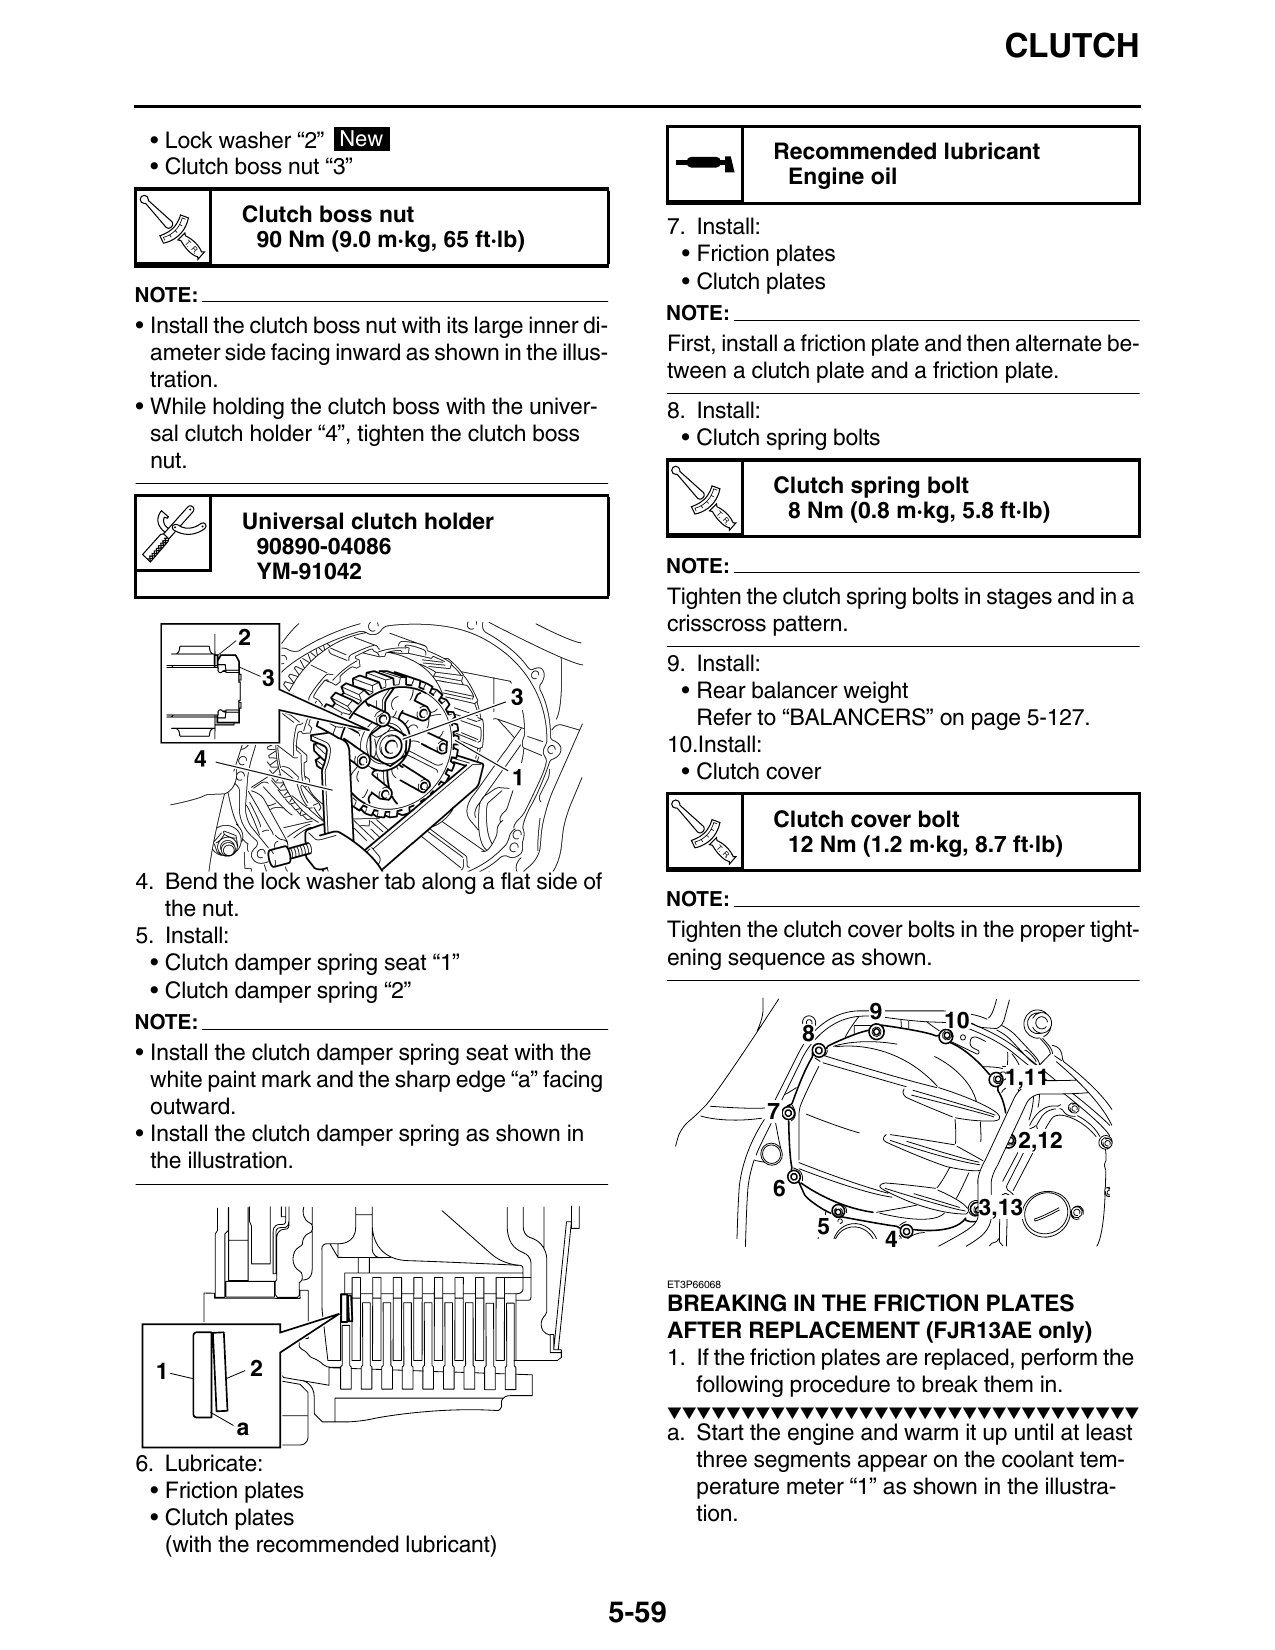
10.Install:
• Clutch cover
Clutch cover bolt
T.
R.
12 Nm (1.2 m·kg, 8.7 ft·lb)
4. Bend the lock washer tab along a flat side of
the nut. NOTE:
5. Install: Tighten the clutch cover bolts in the proper tight-
• Clutch damper spring seat “1” ening sequence as shown.
• Clutch damper spring “2”
NOTE: 9 10
• Install the clutch damper spring seat with the
white paint mark and the sharp edge “a” facing 1,11
outward. 7
• Install the clutch damper spring as shown in 2,12
the illustration.
3,13
ET3P66068
BREAKING IN THE FRICTION PLATES
AFTER REPLACEMENT (FJR13AE only)
2 1. If the friction plates are replaced, perform the
following procedure to break them in.
▼▼▼▼▼▼▼▼▼▼▼▼▼▼▼▼▼▼▼▼▼▼▼▼▼▼▼▼▼▼▼▼
a a. Start the engine and warm it up until at least
6. Lubricate: three segments appear on the coolant tem-
• Friction plates perature meter “1” as shown in the illustra-
• Clutch plates tion.
(with the recommended lubricant)
5-59