Checking The Coolant Temperature Sensor
Fragment manuala — str. 702
📋 Tekst do skopiowania / wyszukiwania
ELECTRICAL COMPONENTS
EAS28260
CHECKING THE COOLANT TEMPERATURE
SENSOR
1. Remove:
• Coolant temperature sensor
EWA14130
WARNING
• Handle the coolant temperature sensor
with special care.
• Never subject the coolant temperature sen-
b. Move the fuel sender float to minimum “3” sor to strong shocks. If the coolant temper-
and maximum “4” level position. ature sensor is dropped, replace it.
2. Check:
• Coolant temperature sensor resistance
4 Out of specification → Replace.
Coolant temperature sensor re-
sistance
290–354 Ω at 80 °C (176 °F)
▼▼▼▼▼▼▼▼▼▼▼▼▼▼▼▼▼▼▼▼▼▼▼▼▼▼▼▼▼▼▼▼
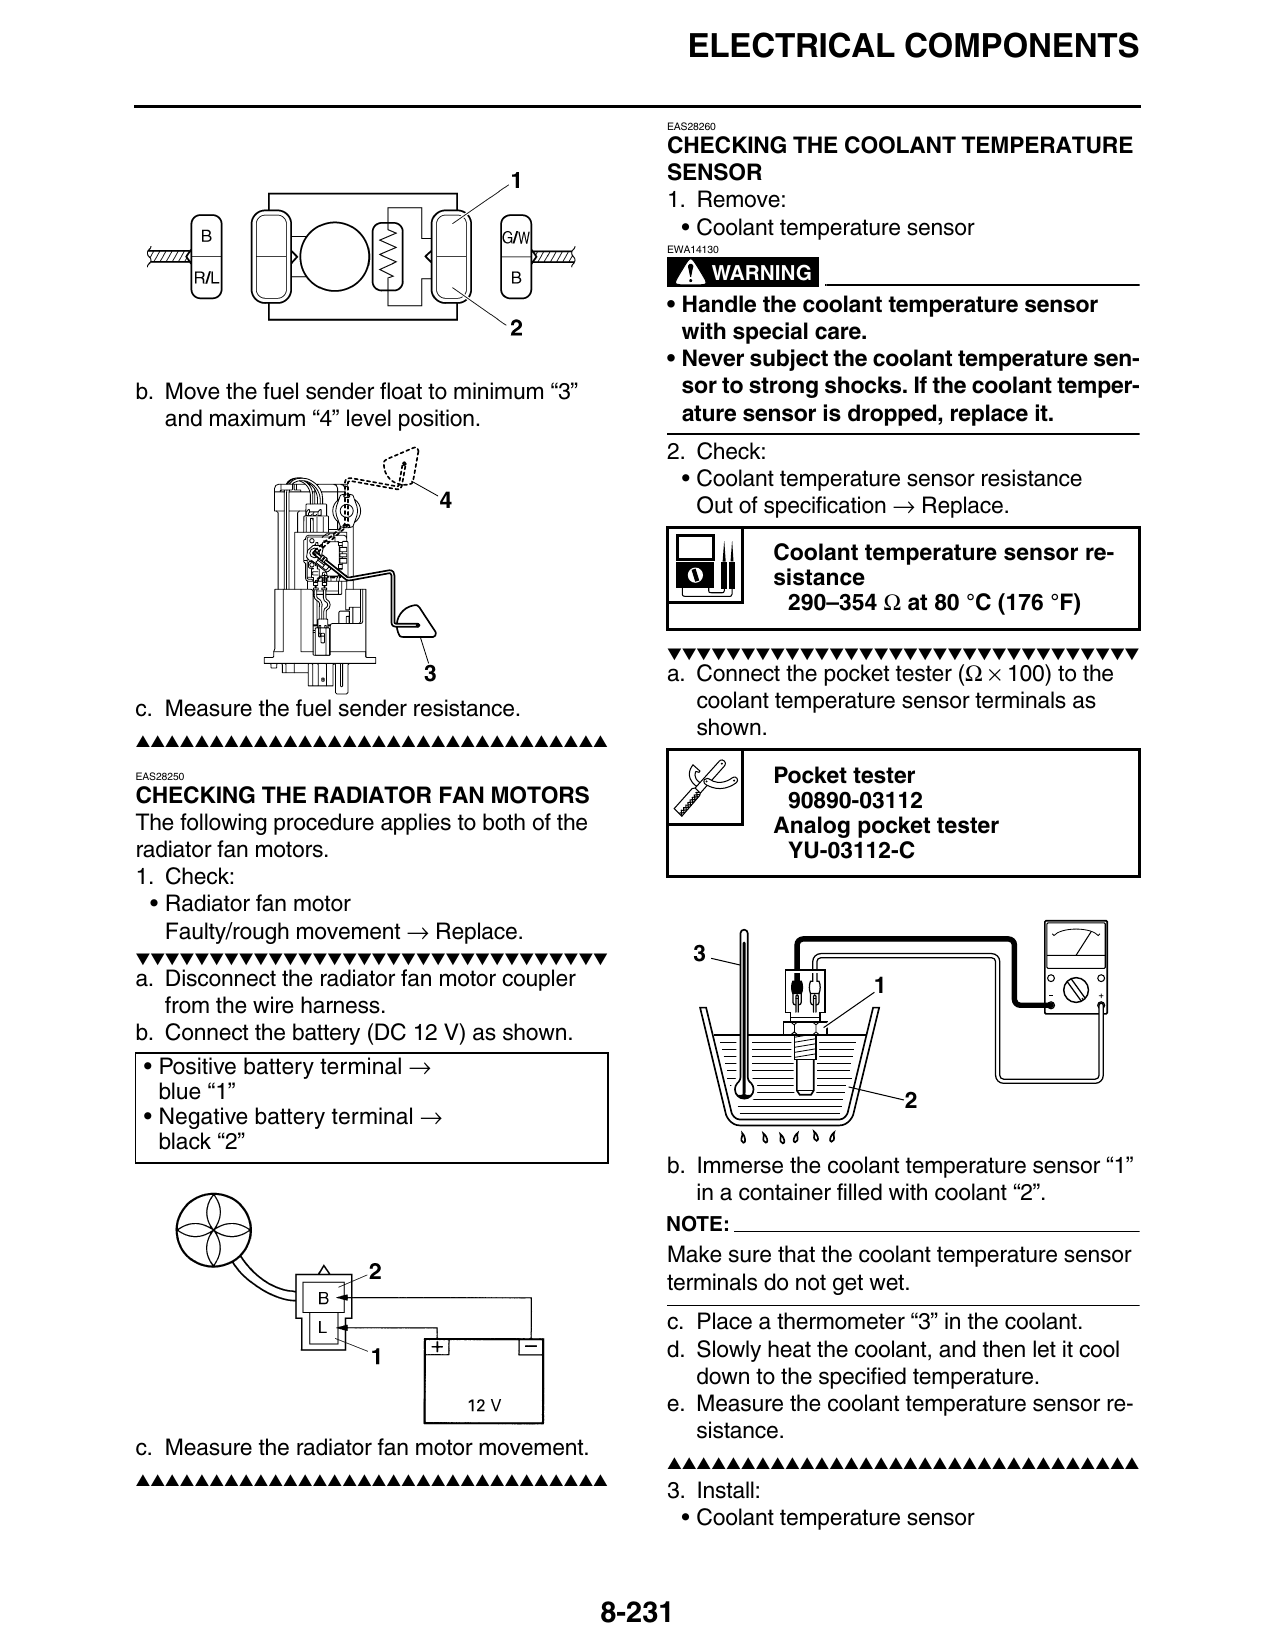
3 a. Connect the pocket tester (Ω × 100) to the
c. Measure the fuel sender resistance. coolant temperature sensor terminals as
▲▲▲▲▲▲▲▲▲▲▲▲▲▲▲▲▲▲▲▲▲▲▲▲▲▲▲▲▲▲▲▲
shown.
EAS28250 Pocket tester
CHECKING THE RADIATOR FAN MOTORS 90890-03112
The following procedure applies to both of the Analog pocket tester
radiator fan motors. YU-03112-C
1. Check:
• Radiator fan motor
Faulty/rough movement → Replace.
▼▼▼▼▼▼▼▼▼▼▼▼▼▼▼▼▼▼▼▼▼▼▼▼▼▼▼▼▼▼▼▼ 3
a. Disconnect the radiator fan motor coupler 1
from the wire harness.
b. Connect the battery (DC 12 V) as shown.
• Positive battery terminal →
blue “1” 2
• Negative battery terminal →
black “2”
b. Immerse the coolant temperature sensor “1”
in a container filled with coolant “2”.
NOTE:
Make sure that the coolant temperature sensor
terminals do not get wet.
c. Place a thermometer “3” in the coolant.
d. Slowly heat the coolant, and then let it cool
down to the specified temperature.
e. Measure the coolant temperature sensor re-
sistance.
c. Measure the radiator fan motor movement.
▲▲▲▲▲▲▲▲▲▲▲▲▲▲▲▲▲▲▲▲▲▲▲▲▲▲▲▲▲▲▲▲
▲▲▲▲▲▲▲▲▲▲▲▲▲▲▲▲▲▲▲▲▲▲▲▲▲▲▲▲▲▲▲▲
3. Install:
• Coolant temperature sensor
8-231